
Agendas
The following video will discuss how to add Agendas and how to add Planning Notes to your Agendas.
Additionally, there are directions below the video as well.
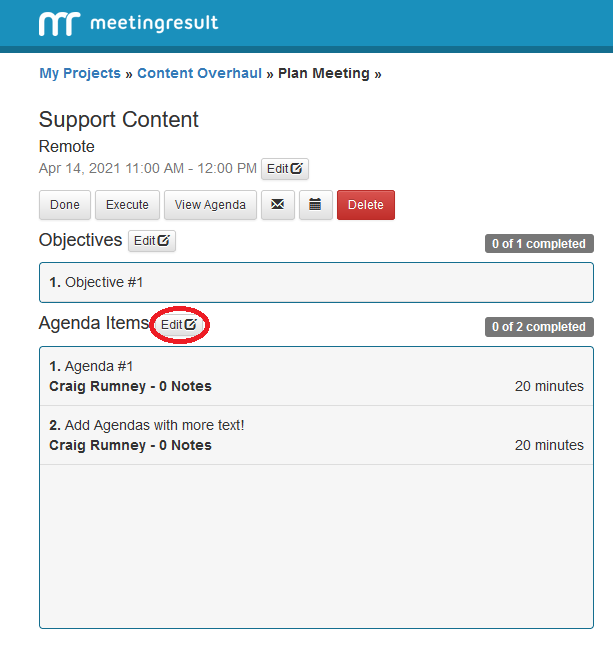
Click on the Edit button to the right of the Agenda Items label.
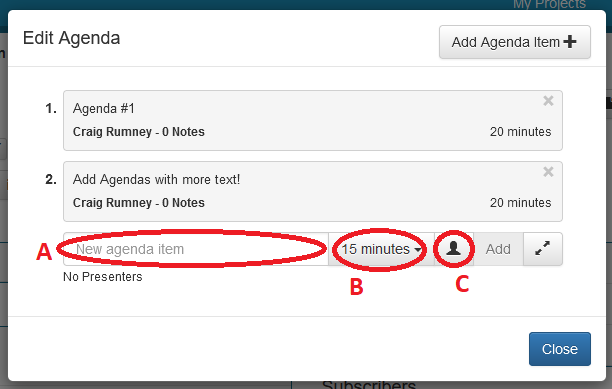
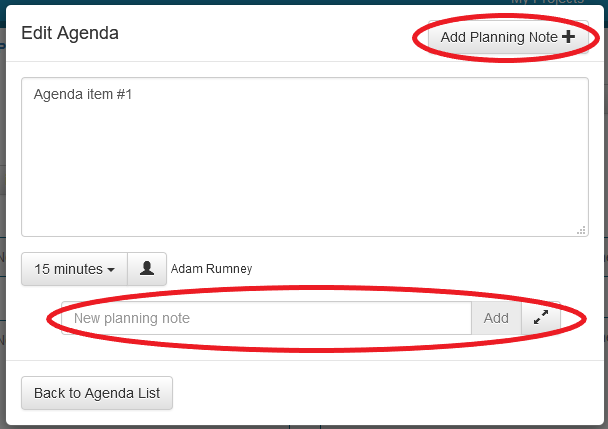
The Edit Agenda window will appear.
Here you can do the following:
A - Use the Quick Add feature by entering the text of your Agenda Item.
B - Choosing the time allocated to the Agenda Item from the drop down time selection control.
C - Selecting the presenter by clicking on the person icon and clicking the ‘Add’ button.
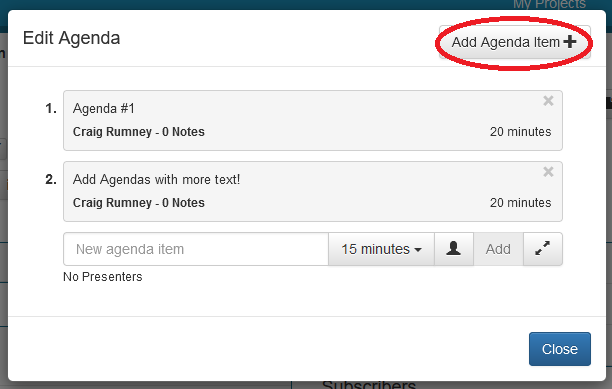
Alternatively, you can click on the "Add Agenda Item" button in the upper right-hand corner of the popup to open the full Agenda Item editor if your Agenda Item description requires more space than provided on the Quick Add view.
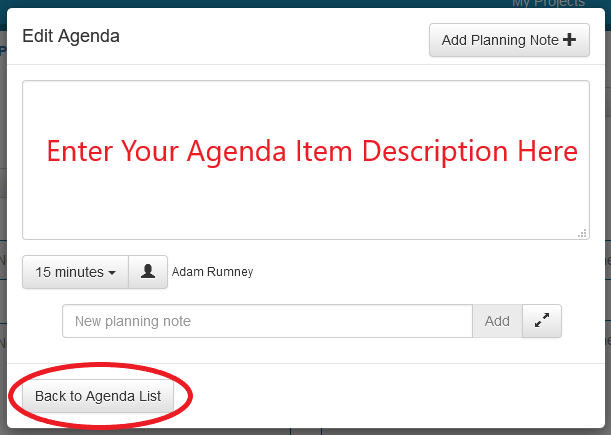
If you decide to open the full Agenda Item editor screen then type the Agenda Item description in the text box provided, click on the time selection drop down and choose the amount of time allocated to the Agenda Item and click on the Person icon to choose the presenter(s) for the Agenda Item. A popup window will appear, and you can type in the name of the presenter to immediately locate them in the list or scroll and click on the name(s) of the presenter(s). When finished click "Back to Agenda List".
Planning Notes
Planning notes are important details that you, the Meeting leader, want to remember when a particular Agenda Item is covered.
Note: The planning notes will not show up on the Agenda that you will distribute. If you want to create planning notes for an Agenda Item, you must open the full Agenda Item editor because this feature is not available using the “Quick Add” feature for Agenda Items.
Step 1 – Make sure to first open the Agenda Item Editor by clicking “Add Agenda Item +” or the arrows to the right of “Add”. There are two ways you can add a Planning Note. One way is with the “Quick Add” feature at the bottom of the form. The second option is by clicking on the arrows to the right of “Add” or click “Add Planning Note +” in the upper right hand corner of the form.
Step 2 – Add text to your planning note
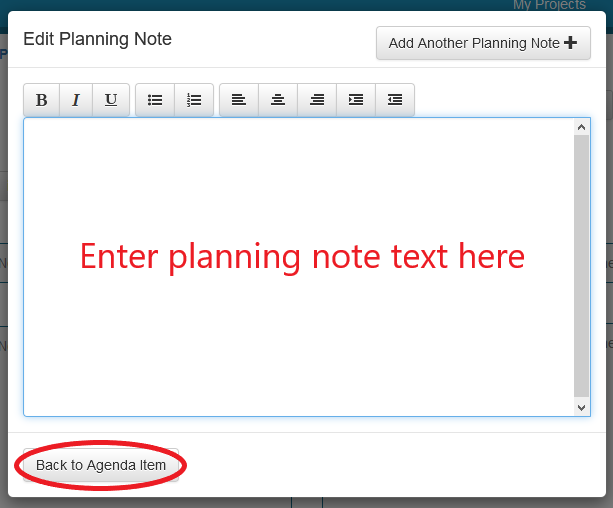
Step 3 - To create additional planning notes repeat steps 1 & 2
Step 4 – When you are finished creating planning notes, click the “Back to Agenda Item” button located in the bottom left hand corner of the Edit Planning Note popup window
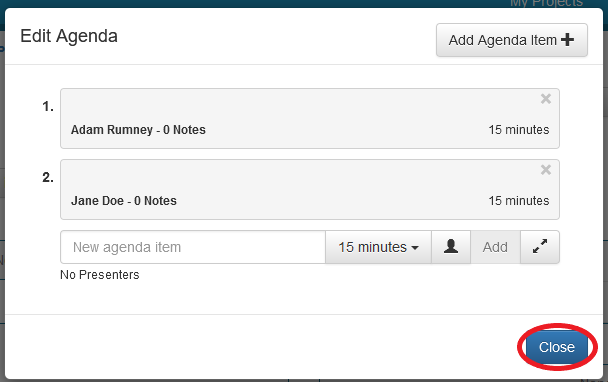
You can create additional Agenda Items if you choose, when you are finish click the blue ‘Close’ button
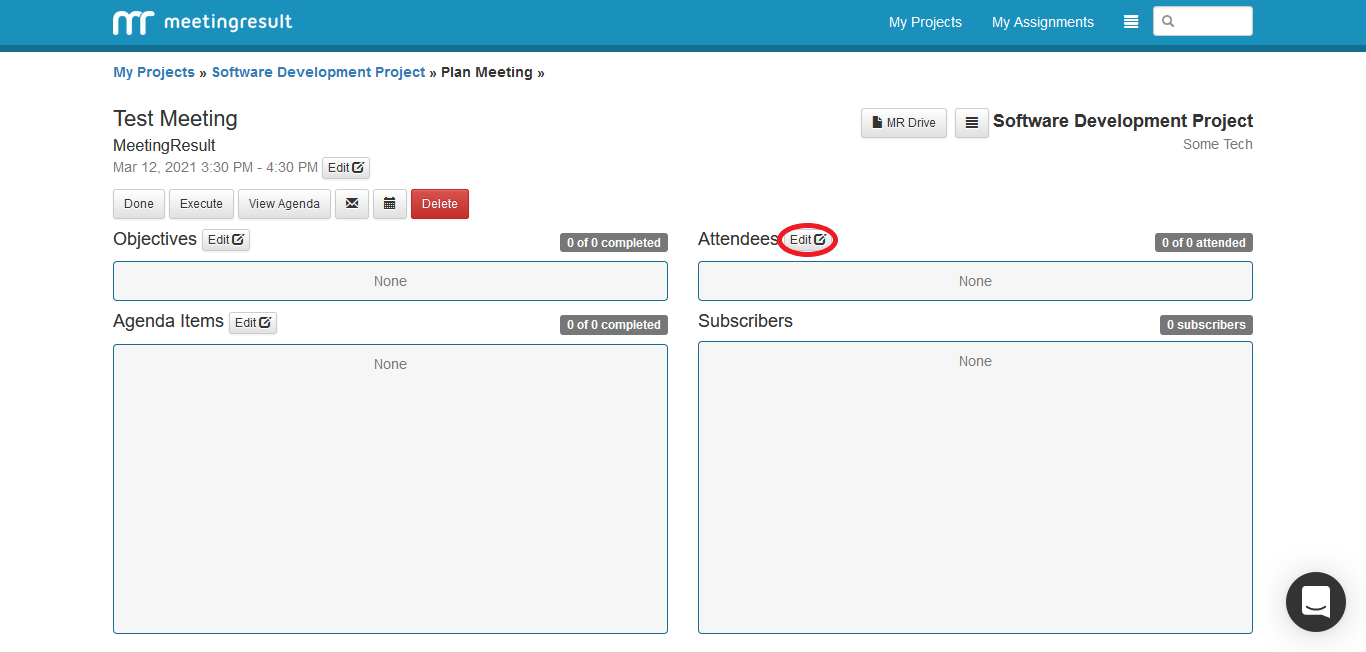
Add Attendees and Subscribers
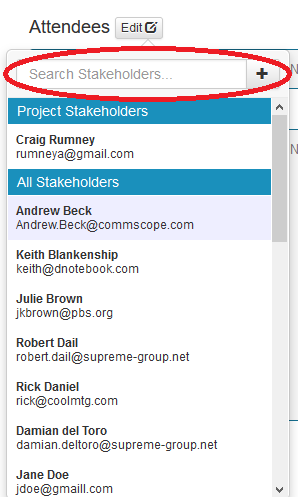
You will notice that any presenters you added to the meeting’s Agenda will automatically be added to the Attendees list. To add more Attendees and Subscribers click on the “Edit” button to the right of the Attendees label.
Here we have a list of all the Stakeholders that were previously added. Stakeholders for the associated Project are displayed at the top and your full Stakeholder list is displayed next. You may scroll through the Stakeholder list or use the Search Box at the top of the list to find a specific Stakeholder.
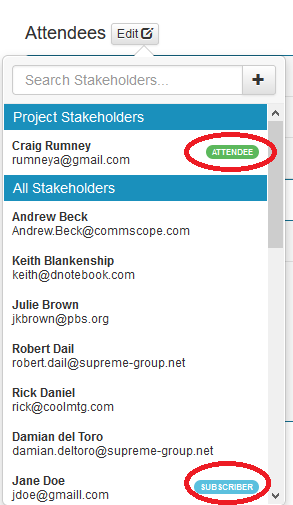
To select a Stakeholder as an Attendee click on their name once. A green ‘attendee’ label will appear to the right of their name. You can also select a Stakeholder as a Subscriber. To make a Stakeholder a Subscriber, click their name a second time and a blue ‘subscriber’ label will appear to the right of their name. Remember that Subscribers are people that you are not inviting to the meeting but will be sent a copy of the meeting summary report following the meeting so that they are kept informed.
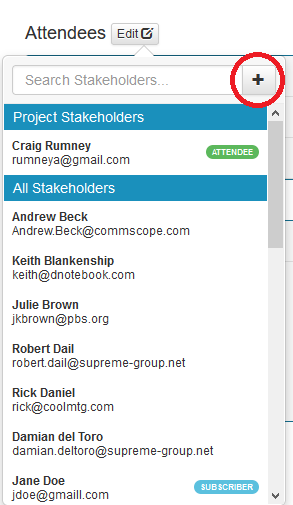
Repeat this process for all the Attendees and Subscribers for your Meeting. If you want to add a Stakeholder that doesn’t already exist simple click on the ‘plus’ button to the right of the Stakeholder search box to add a new Stakeholder on the fly.
When you are finished, click somewhere off the Attendee popup window to close the window.
Comments