
The video below will discuss how to Execute a Meeting.
To Execute a Meeting, you may select the Meeting from the “Upcoming Meetings” section or select the Project that has the meeting you want to execute.

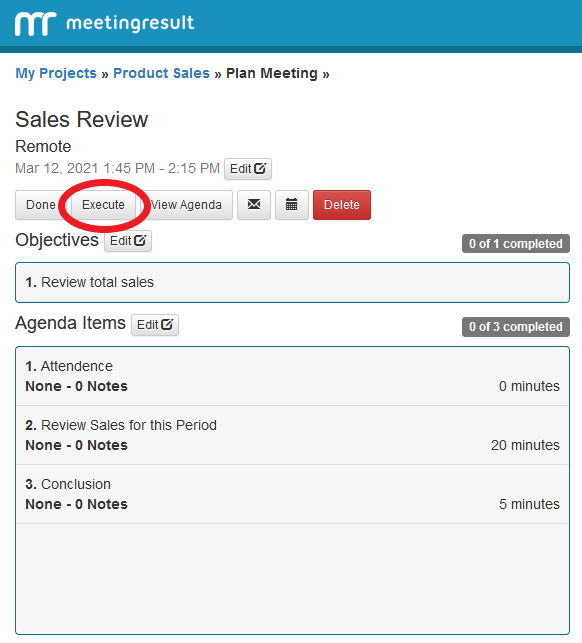
Click on the meeting you want to execute to bring up the Meeting Dashboard. To execute the meeting simply click the “Execute” button located above the “Objectives” label. This opens the Meeting Execution dashboard.
PLEASE NOTE: It is a Best Practice to review the Objectives and Agenda with attendees to ensure they understand the goals and approach for the Meeting. We highly recommend you read our book, Powerfully Simple Meetings (available on Amazon in print and Kindle versions), to understand why this is so important to the success of the meeting.
There are five core Meeting Assets defined in our Powerfully Simple Meeting or PSM System. These important details represent the value that is generated during the meeting. During the Meeting you will identify and capture the most important details of the meeting through these Meeting Assets.
Capture Note
The most basic type of Meeting Asset is the Note. Notes are key pieces of information that need to be communicated and preserved. They could be ideas generated during the Meeting or other observations that need to be captured.
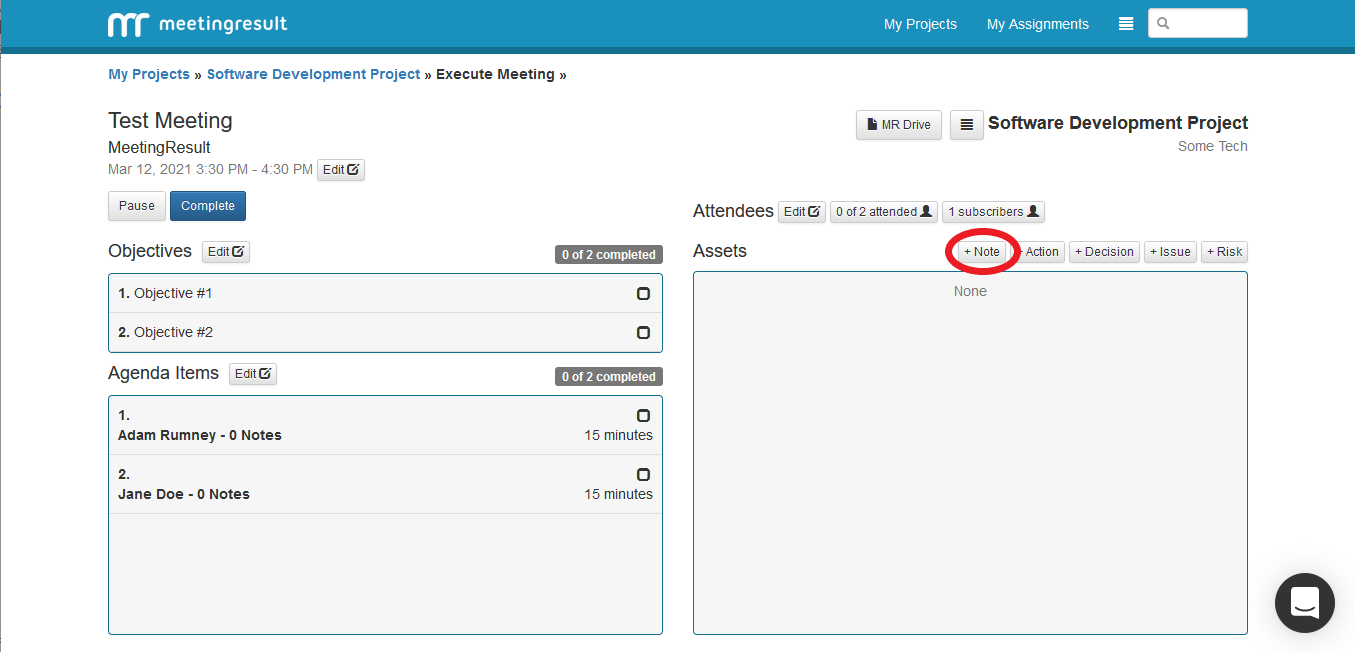
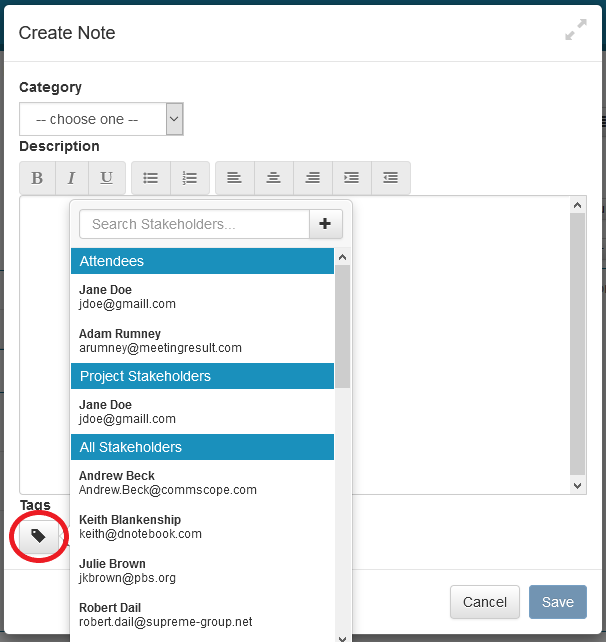
To capture a note, click on the “Note” button to the right of the Assets label on the Meeting Execution Screen. A popup window will appear where you can enter the text of the note in the Description text box.
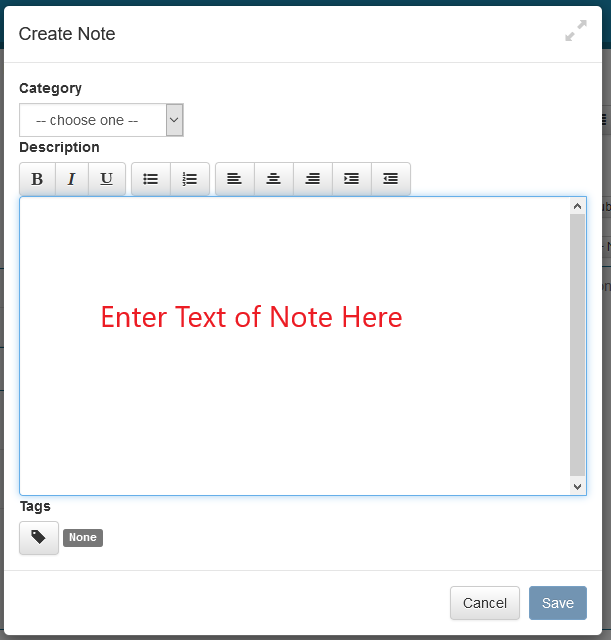
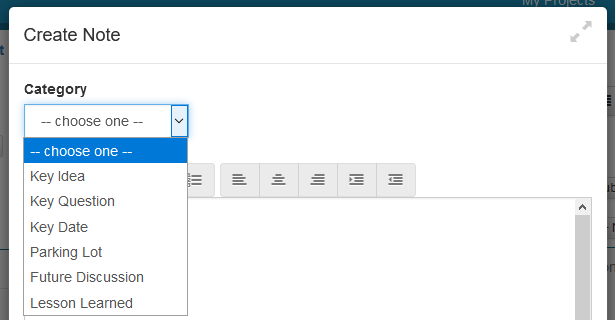
Optionally you can further specify the nature of the Note by selecting one of the available options for the Category drop-down menu.
If there is someone not at the meeting and is not a Meeting Subscriber, you can choose to Tag them on the Meeting Asset, by clicking on the “Tag” icon located in the bottom left of the popup windows. You can either scroll to the Stakeholder you want or use the search box to jump to them. Click on their name to tag them.
Tagging someone on a meeting Asset will trigger a system-generated email that can optionally be sent to the tagged individual when the Meeting is completed. The email will contain a link that will take the person to a web page where they can view the details of the Meeting Asset including the meeting name, date and time where the Meeting Asset was captured. This is a great way to loop in people to discussion when they were not present.
When you are finish click “Save” in the lower right-hand corner of the popup window to save your Note.
Capture Action Item
Action Items are specific assignments made to a Meeting Attendee during the meeting. Action Items have a Description, Owner and Due Date. The Description describes what needs to be done. The Owner assigns responsibility for performing the Action Item and finally, the Due Date specifies when the Action Item needs to be completed.
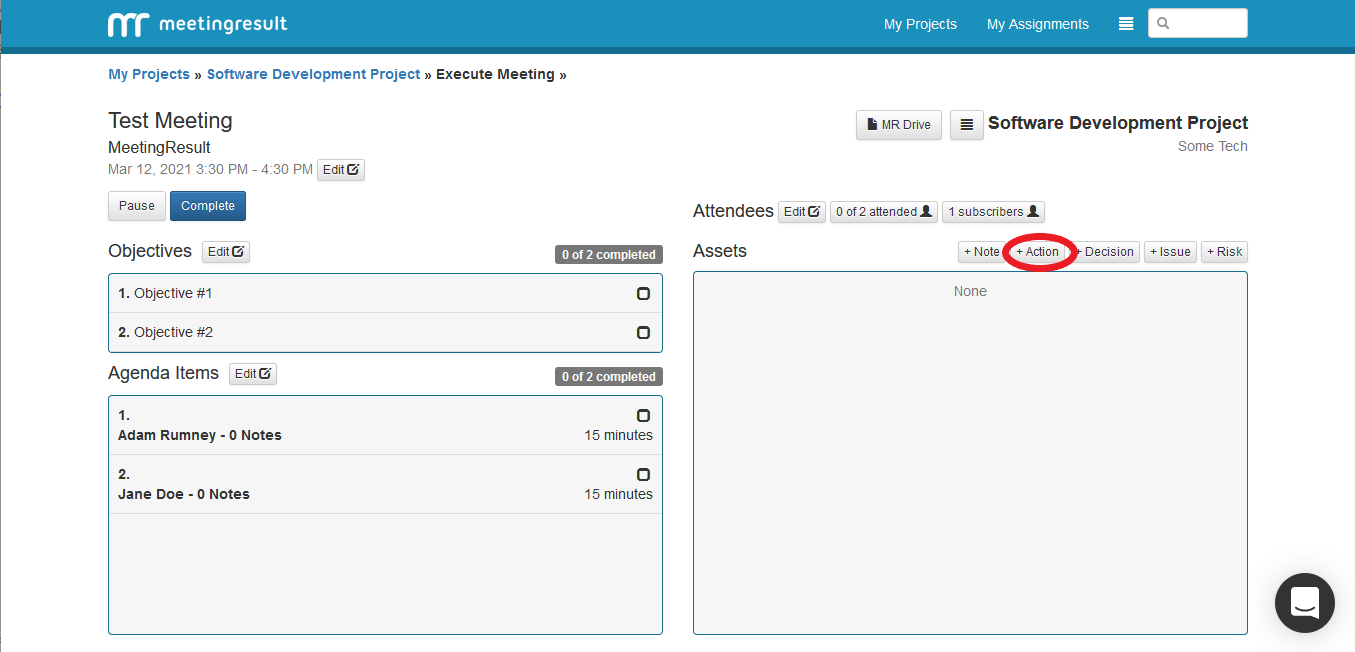
To create an Action Item, click the “Action” button to the right of the Assets label.
A popup will appear. This is where you will enter the text of the Description. This is denoted as "A" in the screenshot below.
Next, click on the “Person” icon to choose the Stakeholder that you are assigning to the Action Item. This is denoted as "B" in the screenshot below.
Again, you may either scroll through the list of Stakeholders or use the Search box at the top of the list to find your specific Stakeholder. Click on the name of the Stakeholder to select them.
Next, click on the “Calendar” icon next to the Date field and select the Date the Action Item is due by using the popup calendar. This is denoted as "C" in the screenshot below.
You can tag a Stakeholder who is not at the Meeting and is not a Meeting Subscriber by clicking the “Tag” icon located at the bottom left of the popup. This is denoted as "D" in the screenshot below.

When finished, click the “Save” button in the lower right-hand corner of the popup window to save the Action Item.
Capture Decision
The next Meeting Asset is the Decision. Decisions have a Title and Description. The Title provides a one-sentence summary of the Decision and the Description describes more details about the Decision including who made the Decision.
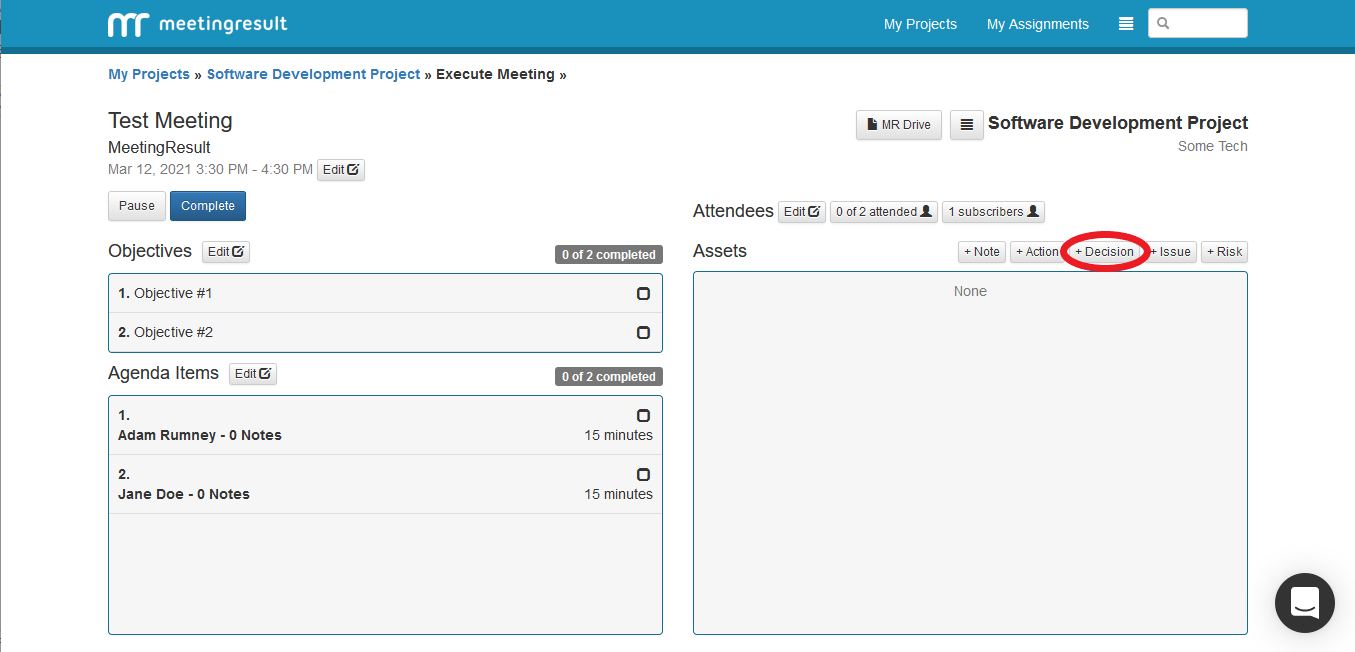
To capture a Decision, click on the “Decision” button to the right of the Assets label on the Meeting Execution screen.
A popup window will appear where you will enter the Title of the Decision and the Description.
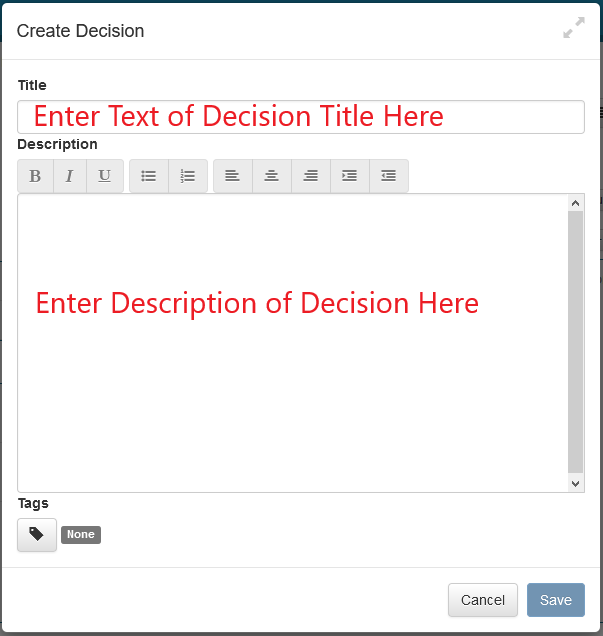
Again, you can Tag a Stakeholder who is not at the Meeting and is not a Meeting Subscriber by clicking on the “Tag” icon located on the bottom left of the popup.
When finished click the “Save” button located at the bottom right of the popup.
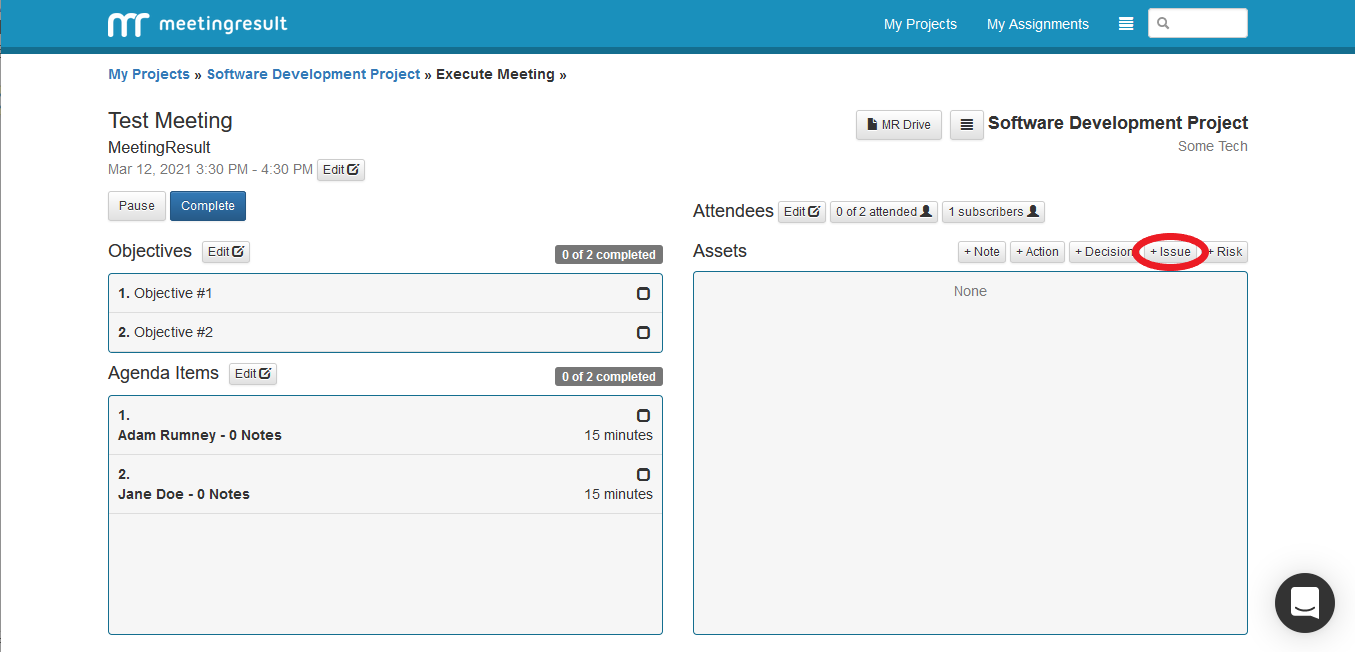
Capture Issue
The next Meeting Asset is an Issue. Issues have a Name, Description, Severity, Owner and Date.
Click on the “Issue” button to the right of the Assets label on the Meeting Execution screen.
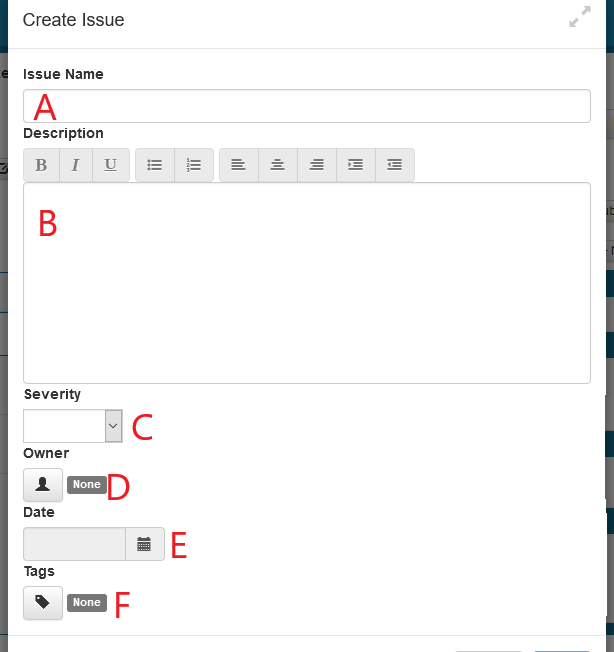
Enter the Name and Description of the Issue. This is denoted as "A" and "B" respectively in the screenshot below.
Select the Severity of the Issue from the drop-down list. Severity is expressed as low, medium or high. This is denoted as "C" the the screenshot below.
Click on the “Person” icon to select the Stakeholder you are assigning to the Issue. Either scroll through the list or search for your Stakeholder using the search field. This is denoted as "D" in the screenshot below.
Next, click on the “Calendar” icon next to the Date field and select the target Date for the Issue to be resolved. This is denoted as "E" in the screenshot below.
Finally, you can tag a Stakeholder who is not at the meeting and is not a Meeting Subscriber. Do this by click on the “Tag” icon located in the bottom left of the popup window. This is denoted as "F" in the screenshot below.
When finished click the “Save” button located at the bottom right of the popup window.
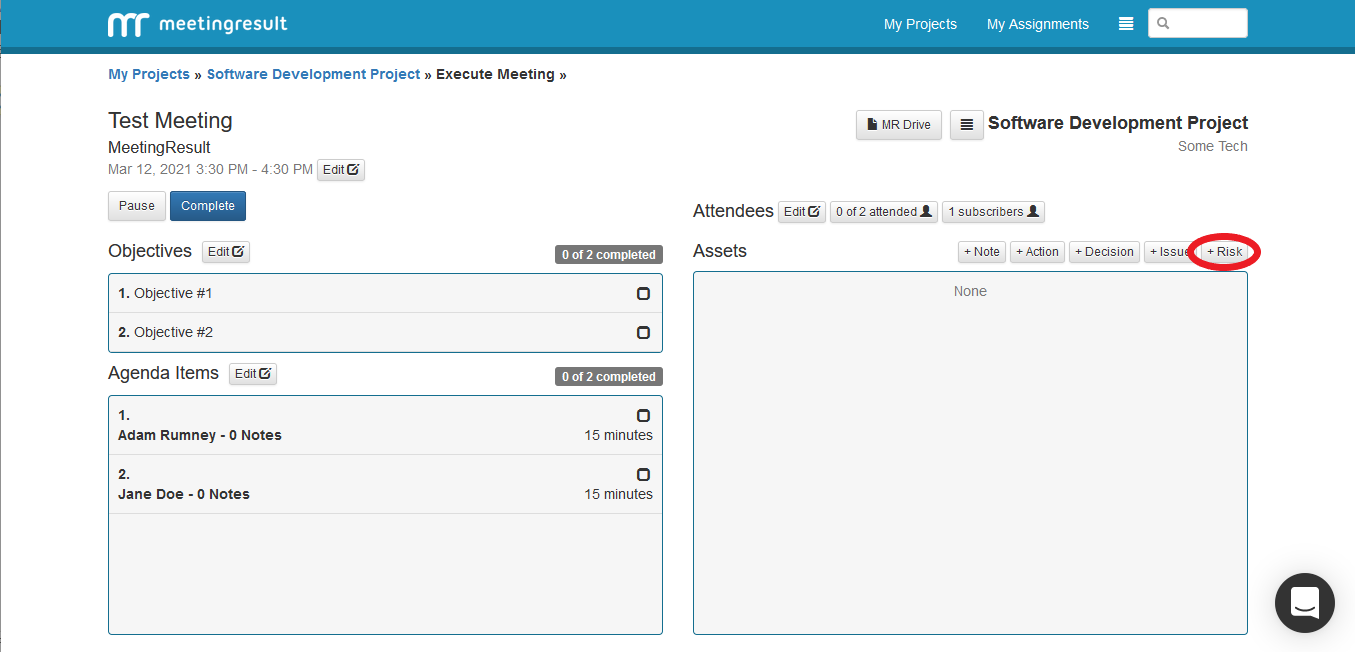
Capture Risk
The next Meeting Asset is the Risk. Risks have a Risk Event Name, Description, Mitigation, Impact, Probability, Owner and Date.
Click on the “Risk” button to the right of the Assets label on the Meeting Execution screen.
In the popup window, enter the Event Name (denoted as "A" in the screenshot below), Description (denoted as "B") and Mitigation (denoted as "C") for the Risk.
Select the Impact of the Risk from the drop-down list. Impact is expressed as very low, low, medium, high or critical. This is denoted as "D" in the screenshot below.
Next, select the Probability of the Risk occurring from the drop-down list. Probability is express as very unlikely, unlikely, probable, likely or certain. This is denoted as "E" in the screenshot below.
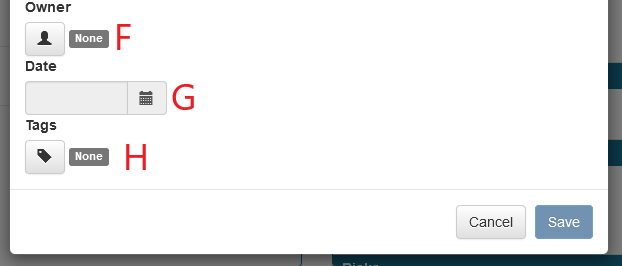
To assign the Risk to a Stakeholder, click on the “Person” icon and select the Stakeholder from the list by either scrolling through or using the search field. This is denoted as "F" in the screenshot below.
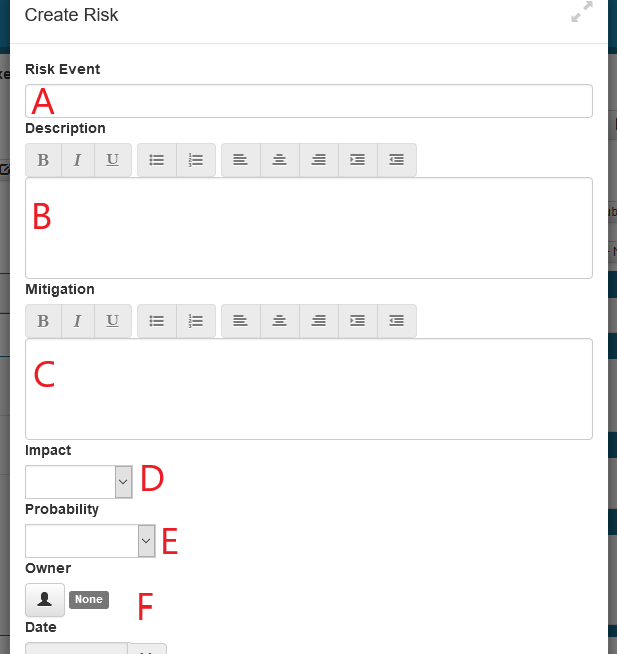
Next, we will select a Date. The Date is the deadline by which the Risk event will be managed, either through mitigation, acceptance or other means. Click on the “Calendar” icon next to the Date field and select the deadline Date using the popup calendar. This is denoted as "G" in the screenshot below.
You can “Tag a Stakeholder who is not at the Meeting and is not a Meeting Subscriber. Do this by clicking on the “Tag” icon at the bottom left of the screen. Select a Stakeholder by either scrolling through the list or using the search field. This is denoted as "H" in the screenshot below.
Click the “Save” button on the bottom right when finished.
Comments