
Here we will be discussing how to create and distribute a Meeting Summary Report.
When you have completed a Meeting, you can create and distribute a Meeting Summary Report, which contains.
- Stakeholders present at the Meeting.
- Objectives achieved during the Meeting.
- Agenda Items completed during the Meeting.
- All Meeting Assets captured during the Meeting.
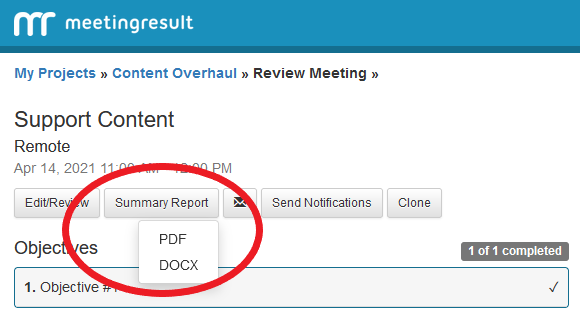
To create and view the Meeting Summary Report go into a Completed Meeting and above the Objectives label is the “Summary Report” button. When you click the “Summary Report” button a drop-down menu will give you two options for the format of your Summary Report. Once the summary report is created it can be downloaded to your computer. If you choose the Word format it will automatically be downloaded with no further steps.
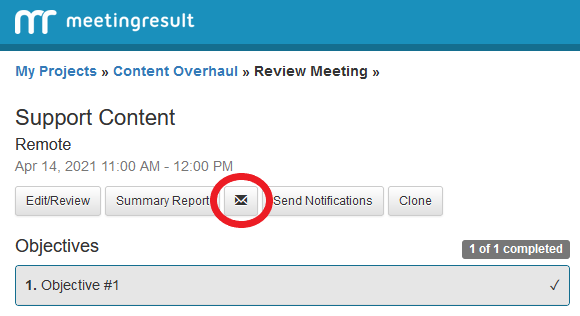
When the Meeting Summary Report has been reviewed and you are ready to distribute it to attendees and subscribers, click on the envelope icon next to the summary report button.
An email editor will be spawned.
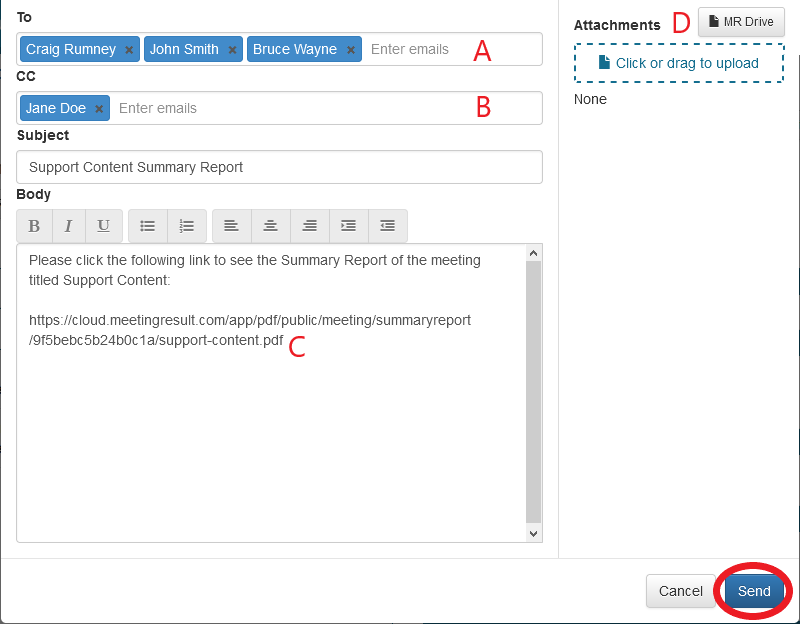
Here you will see that all of your attendees are included in the To: field denoted by A in the screenshot below.
Subscribers are included in the Cc: field denoted by B in the screenshot below.
The Meeting Summary Report is included as a link within the body of the email denoted by C in the screenshot below.
You can optionally add attachments to the email from MR Drive or drag and drop them from your computer. The MR Drive button is denoted by D in the screenshot below.
When the email is ready to be sent, click the blue Send button in the bottom right-hand corner of the email editor window.
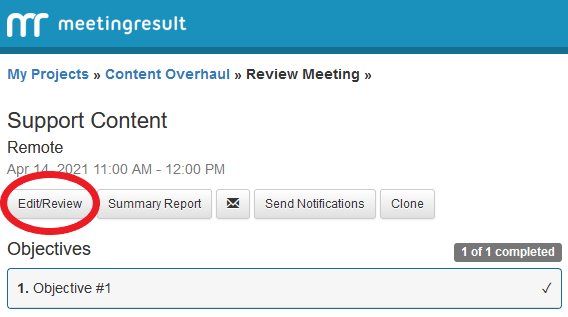
You may receive updates from Meeting Attendees after your Meeting is completed. To edit details about the Meeting you can click on the Edit/Review button located to the left of the “Summary Report” button.
At the Edit/Review screen you can click on and edit all Meeting details including objectives, agenda items, existing meeting assets and add new meeting assets. You can optionally Re-Open a Meeting if you would like to continue with the Execution phase, otherwise click the Done button to save your changes.
Workflow
The following is a look into the workflow when distributing the Meeting Summary Report through the system generated e-mail.
When you choose to have the system send notification emails to all stakeholders who were assigned Meeting Assets during the meeting, they will each receive and email that contains a link that allows the owner of the Meeting Asset to provide status updates and notes for their assignment or assignments.
When a Stakeholder clicks on the email link in the email, they will be taken to a web page where they can view all their assignments for the meeting they attended. They can click on any of the assignments to open a form where they can update status and provide notes for the Meeting leader.
Note: If the Meeting Leader has enabled you as a Team Member you will be prompted to create an account that will provide you access to a Team Member Dashboard where you can view meeting details for all the meetings you have attended and update the status of all assignments.
A Stakeholder may choose the appropriate status from the drop-down list and add any comments for the Meeting leader concerning the action item and click Save. This information will be immediately available to the Meeting leader.
Comments